前言
我们来看看 Vapor 项目是如何初始化,加载配置,并启动起来的。
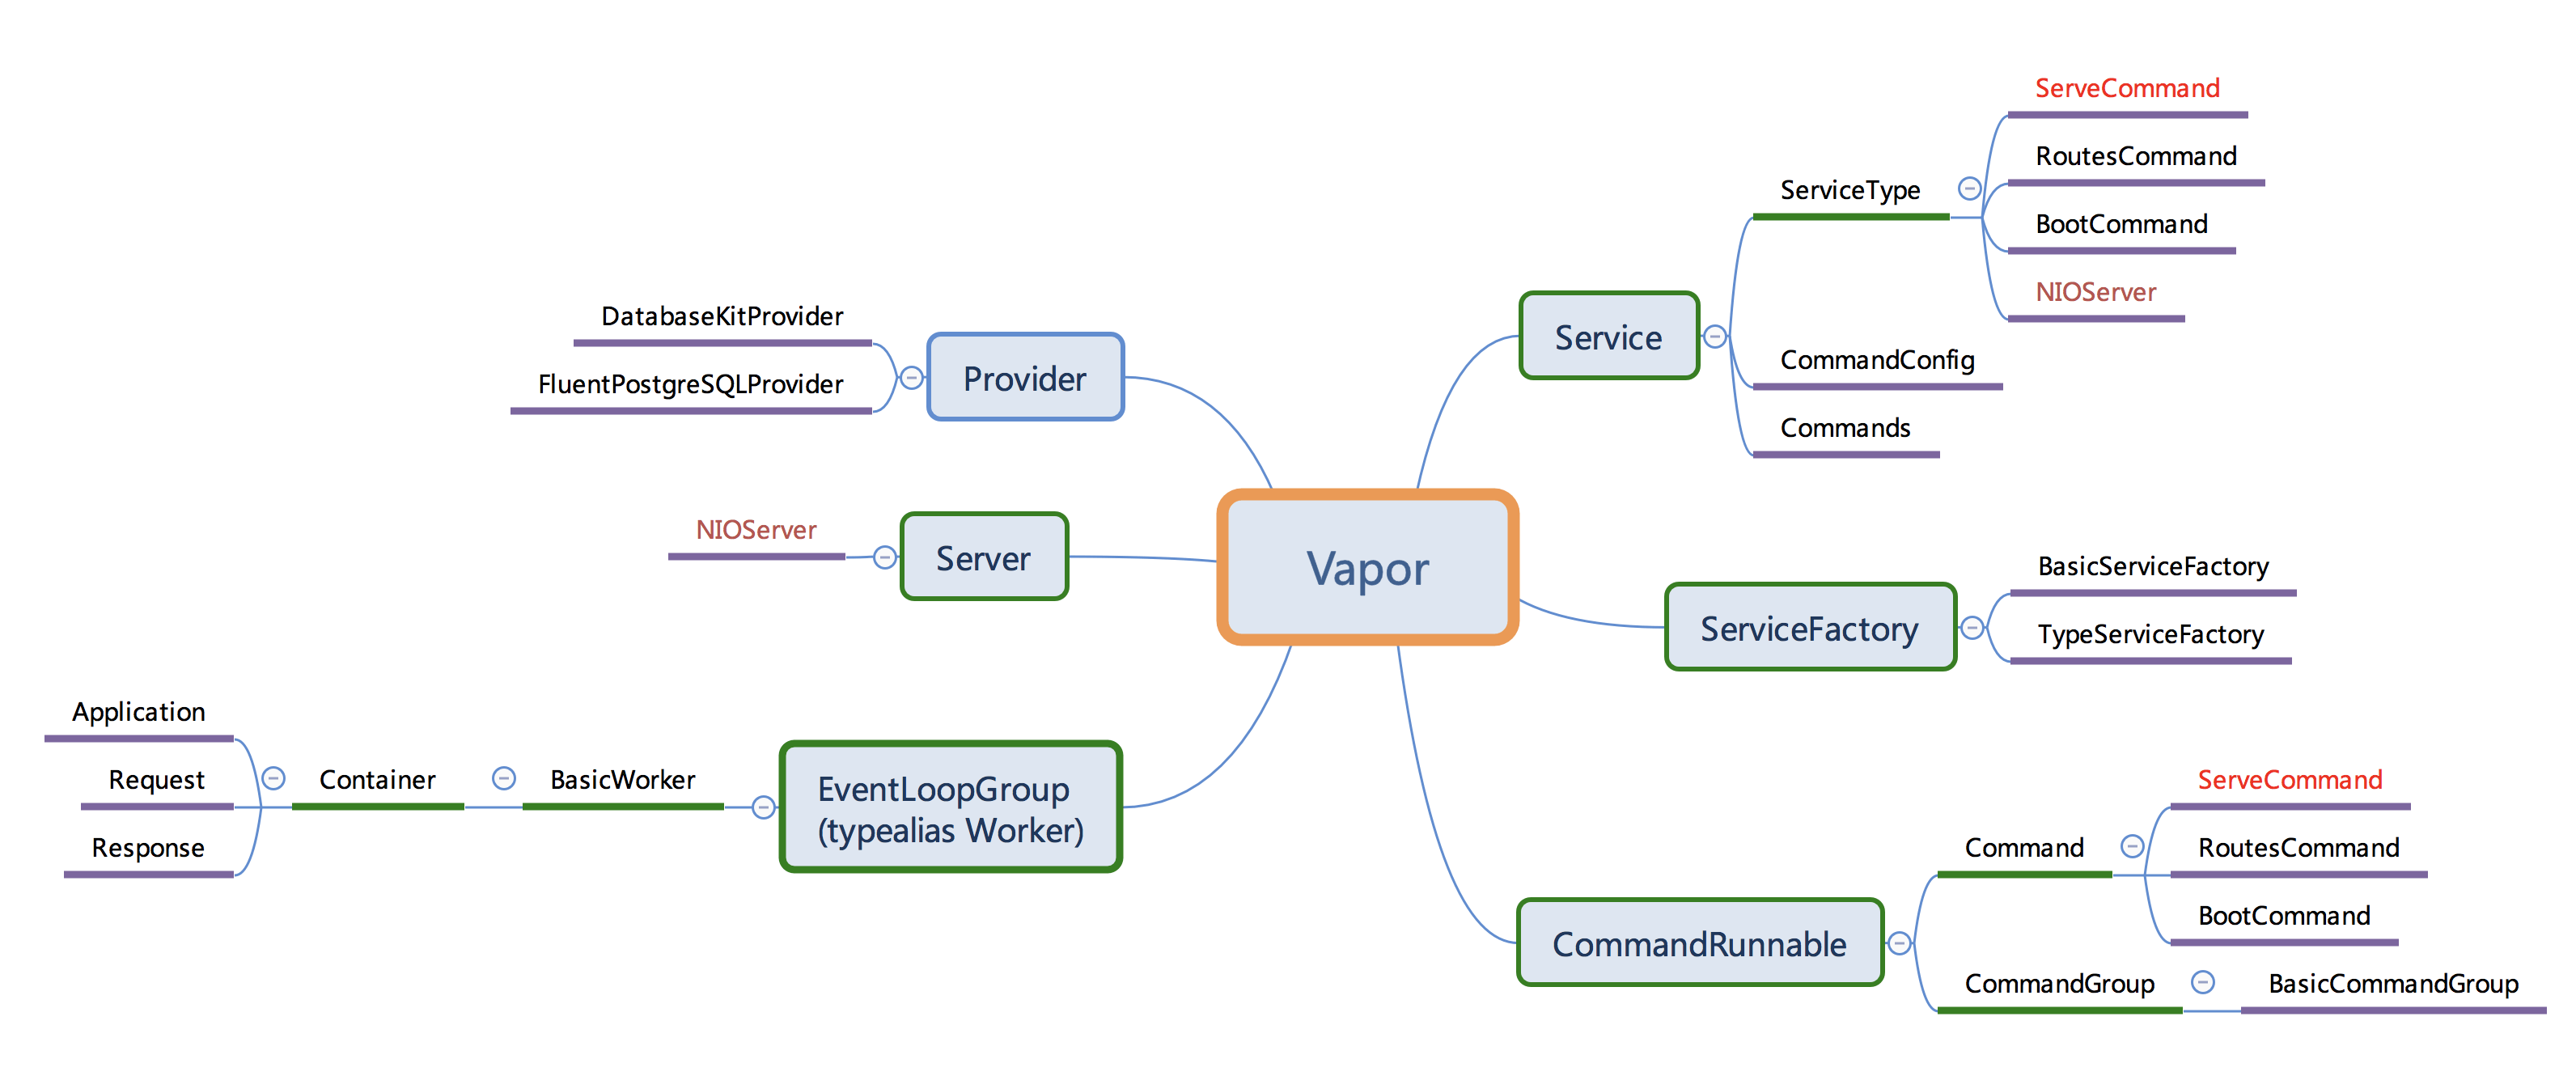
结构图

绿色边框表示 protocol,紫色边框表示 struct 或 class
main.swift
try app(.detect()).run()启动的入口是 main.swift 文件,并且只有上面一行代码。
- app( ) 获取 Application 对象;
- run( ) 异步运行服务,并且当前线程会被锁定。所以在当前代码后面添加任何代码都不会被执行。
为什么是 main.swift,如果你把代码放到其它的 .swift 文件中,则会报错。下面是官文文档的一段摘要:
You’ll notice that earlier we said top-level code isn’t allowed in most of your app’s source files. The exception is a special file named “main.swift”, which behaves much like a playground file, but is built with your app’s source code.
默认值
下面参数都是项目中初始化 Application 对象的默认值。
- Environment:.detect(),默认 development 环境;
- Config:.default(),默认 development 环境;
- Services:.default() ,默认注册了一大批必需的 Service。
Services
如果要了解启动流程的话,那么 Services+Default.swift 中的两个注册的 Service 需要着重介绍:
services.register { container -> CommandConfig in
    return .default()
}
services.register { container -> Commands in
    return try container.make(CommandConfig.self).resolve(for: container)
}
CommandConfig
config.use(ServeCommand.self, as: "serve", isDefault: true)
config.use(RoutesCommand.self, as: "routes")
config.use(BootCommand.self, as: "boot")
上面是 CommandConfig+Default.swift 中的代码。解释了命令 .build/debug/Run serve。isDefault: true 参数标明了默认可以不写,因为 serve 被标记为默认执行的 Command。
- serve:封装 Server 的启动入口为 Service,便于注册到 Services 中。可以附带 hostname,port,bind 参数。bind 的格式为
hostname:port; - routes:所有 Router 注册的接口或页面地址列表;
- boot:没看出来有啥用,就向控制台输出了
Done.字符。
Commands
第二个注册方法做了两件事情:
- 通过第一个 register 方法获得 CommandConfig 对象;
- 利用 CommandConfig 配置的三个 Command 初始化 Commands 对象。
Run
列出 run 方法主要做的几件事情:
- 通过注册的 Commands 对象获得默认执行的 Command - serve;
- 解析 environment.commandInput 的命令行参数;
- 向控制台输出将要执行的命令行;
- 通过获得的参数中的 hostname 和 port,调用 NIOServer 的 start 方法。
后续还需要更多信息,就涉及到 Apple 开源的网路应用程序开发框架 SwiftNIO 了。后续我也会写关于它的文章,敬请期待。
本文由 Bill 创作。
最后编辑时间为: 2018.08.21 at 11:51 am
